The web design process can be complicated and stressful. Many persons such as designers, developers, product managers, clients, and stakeholders should be included. Many elements like wireframes, codes, visuals, content management systems need to be considered. So, to simplify the process and minimize cost, most companies and teams prefer to plan their web designing and developing process in advance.
This is a comprehensive guide to the web design process, covering 10 easy steps, to plan your website design process quickly. It can be used as a template to help companies and teams plan their website design projects of any size easily and effectively.
To create a website, 10 basic steps are required:
Step 1. Gather all the participants
Step 2. Set goals for your projects
Step 3. Define the project scope
Step 4. Audience research and analysis
Step 5. Create the website wireframe and architecture
Step 6. Define visual styles and elements
Step 7. Design website content and details
Step8. Develop the website
Step 9. Test, test, and test
Step 10. Launch and maintain the website
A web design process is a brief plan or documented outline of the steps that you and your team need to develop a website from start to finish. It helps companies and teams save much time and effort.
An effective and executable web design process plan can help you:
Organize and manage all participants effectively.
Plan and assign design and development tasks at different phases properly.
Use and manage different design resources perfectly.
Speed up your website design and development process easily.
In short, before starting to design or build your website, it is highly recommended for you and your team to develop web design process steps in advance.

This is the most comprehensive web design process that you can follow to complete your website design project. To help you understand it better, we've broken it into 10 simple steps:
(Please note: Feel free to skip some steps according to your conditions and needs.)
The web design process plans involve many departments such as design teams, development teams, and market teams. So, to create executable web design steps for everyone, all relevant teams and members, such as UI/UX designers, developers, product managers, clients, stakeholders, and other participants, should be gathered to define the process together.
Of course, this does not mean that you need to gather them all at the same time. That will surely end up in complete chaos. Instead, you need to meet different teams separately and record all their needs and suggestions for later discussion.
Or use 5 of the best team communication tools instead:
Setting goals is the first step in turning the intangible into the tangible. Your clients and other stakeholders can give you good ideas to set an achievable and measurable goal. During the process, you should consider a set of questions:
What type of website do you need and what is its purpose?
Who is your target audience?
What specific features do you want on the site?
What kind of brand do you want to create?
Who are your main competitors?
What makes you different from your competitors?
If these questions are not helpful, this 100 question checklist will surely inspire you. If you are a website design beginner, this website design goal example list is a good tool to help you set the right goals.
5 of the best goal-setting tools can help you:
After setting an executable goal for your teams and companies, the next step is to define the project scope. Making a clear scope creep is not easy, but it is essential to persuade and set expectations for your clients and stakeholders.
One of the most common ways to present your project scope by outlining specific activities and deliverables, along with specific timelines, is to use a Gantt chart, like the one below:
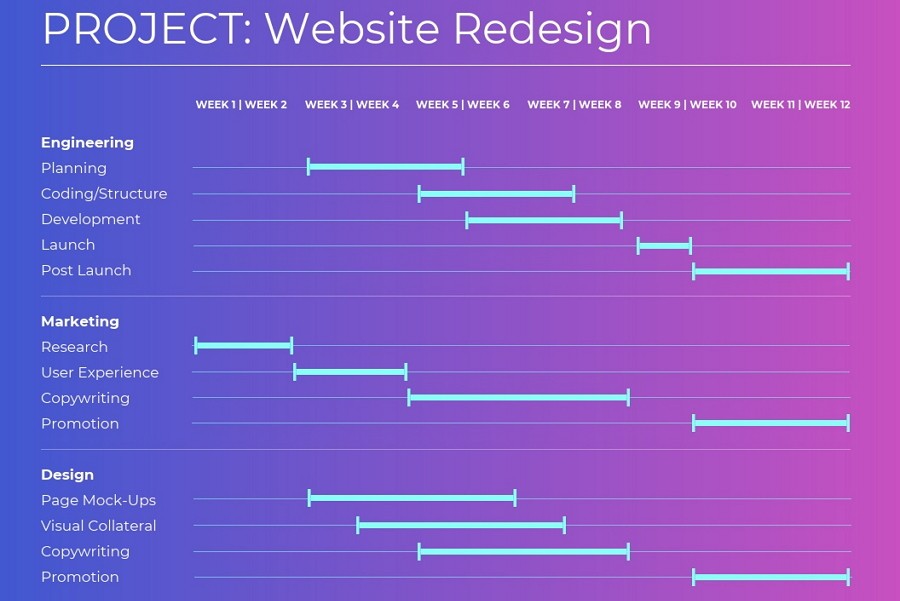
As the above example shows, all the main activities and timelines are intuitively displayed, making the delivery schedule clear and keeping everyone focused on the tasks and goals at hand.
Here are 5 of the best Gantt Chart tools that you can consider:
The needs of the target audience most often determine project goals and the main features on a website. They can also change frequently during the product life cycle. So, to create a product that really meets users' needs, you and your team should focus on audience research and analysis from the start to finish.
Moreover, in this context, the audience not only includes users but also customers, stakeholders, partners, clients, etc.
You can try 5 of the best audience research tools to know and track the needs of your target audience:
Typeform – a survey tool to learn about your audience
Heat-map – a feedback tool to involve your audience
Personapp – a tool to identify the personas of your audience
Followerwonk - a data tool to analyze your audience
User Testing - a user testing tool to analyze your audience
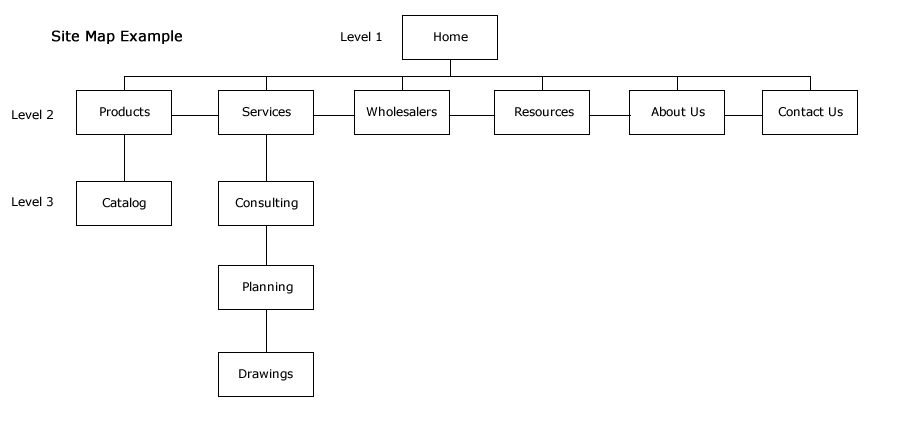
Then, you and your team can discuss the macro-level or direction of your project design, and work out the website architecture. In this step, as with the website architecture, you can focus on creating a sitemap and wireframes for your web pages.
Building a sitemap will not only require you to list all key web pages in advance, but also help you understand the relationships between them, providing you and your team with a clear map of the web information architecture.
You can try 3 of the best sitemap generators to create a clear sitemap for your project:
XML Sitemaps Generator - Create your Google Sitemap Online
Sitemap Generator - Create XML Sitemaps quickly with unlimited URLs
XML Sitemap Generator - Create free Google sitemaps online
If these tools do not work, you can also follow these 5 steps to create a sitemap on your own.
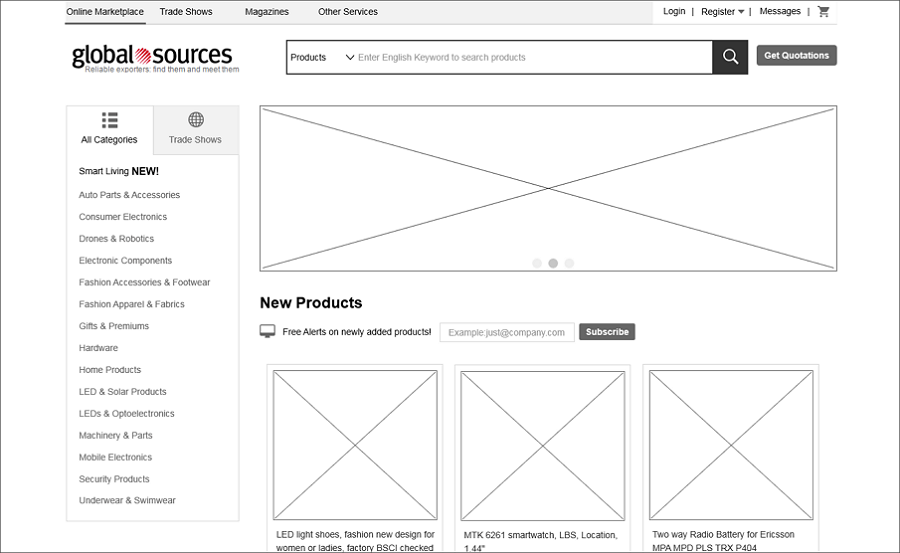
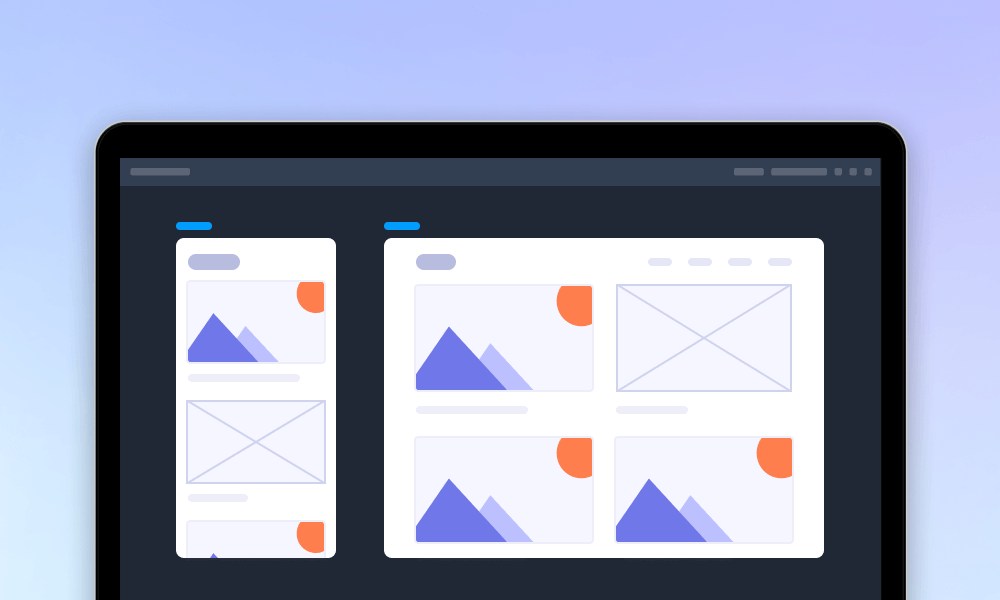
A wireframe is a rough framework about how a web page will look like and presents page details at the structural level. It works more like a blueprint to guide you and your team to draw the outline of the structure and layout and express the main visual of the user interface.
You can use 3 of the best wireframe tools to present page details:
Mockplus - a rapid tool to design, brainstorm and collaborate interactive wireframes
Wireframe CC - an easy tool for creating and sharing wireframes
Pencil Project - a quick wireframe tool that focuses on diagrams and GUI prototypes
After creating a blueprint for your project, the next step is to define the visual aspects of your website, such as the overall visual style, site color palette, and visual elements, etc. These are the steps that you can follow:
To attract the attention of the audience as soon as possible, apart from the functions and interactions, you and your team should choose an eye-catching visual style. You can choose any of these 5 popular visual styles while designing a website:
Illustration style - use custom illustrations to engage web visitors
Single page style - all pages are contained and can be browsed on a single page
Minimalistic style - use much less and simpler elements to create best UX
Flat web design style - load fast and bring visitors a more pleasant experience
Brutalist style - use the most eye-catching, even weird design ideas to engage visitors
These days, illustration style and minimalistic style are highly recommended. When defining visual styles and elements, using pre-existing design templates can expedite the process, providing inspiration and coherence in projects.
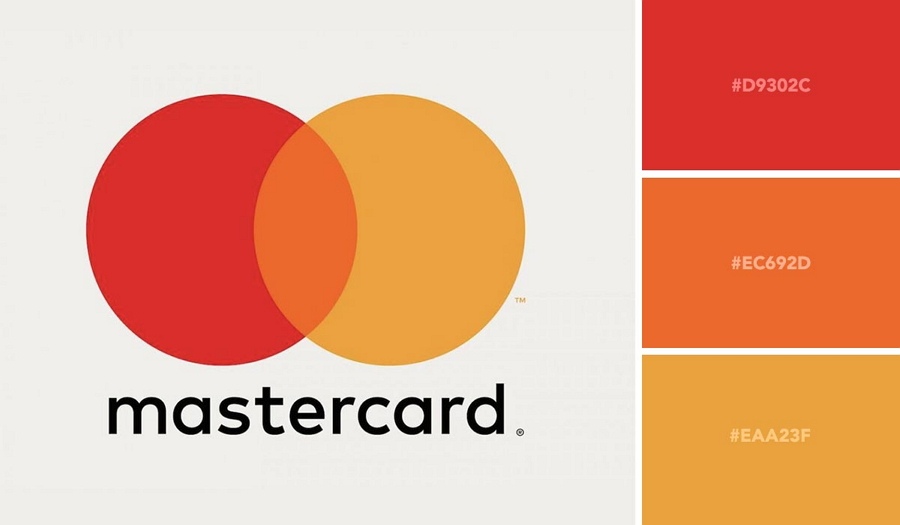
The brand plays a very important role in promoting your products and website. So, you should pay much attention to the brand visuals such as the logo, logo color palette, text, and fonts. Also do not forget to check some brand examples or web site design mood board examples to get inspiration.
Finally, you are supposed to define the visual elements. Many visual elements such as colors, fonts, typography, layouts, grids, featured images, CTA, and images should be discussed.
You can learn more about this topic by reading what is visual design and how to learn it from scratch.
Now, it is time to talk about the website content and page details. You need to visualize all the page details according to the sitemap and wireframe that you've created. Your entire product team should work together to optimize, test, and iterate the minute details of each page. The marketing team should get involved in developing an effective SEO strategy for your web content.
3 of the best web design tools can improve your efficiency of adding web page details:
Sketch - a vector tool to create static and high-quality web pages
Axure - a prototyping tool to create websites and pages from scratch
Mockplus Cloud - an all-in-one platform to design, prototype, collaborate, and handoff web page details
After the website design has been iterated to be the best version, it's time to develop all web pages and details, including the front-end and back-end coding. Product teams and development teams should also communicate and collaborate flawlessly to translate every design detail into reality.
To code every design detail smoothly, you can also follow these steps:
Thanks to newer web standards executed in current browsers, developers can now easily use plain CSS and JavaScript to achieve a goal that used to require hundreds of lines of framework codes. However, that doesn't mean you don't need a framework. Using a web framework template or building a simple framework on your own can simplify your development process and help you improve work efficiency.
These days, many websites have very similar key pages, like home, contact, product, pricing page, etc. You can code templates for each of these page types and use them on different websites.
And then, it's time to fill the page details such as videos, links, images, and interactions. To avoid any potential issues, you should pay attention to all possible details.
Remember to go through every page and check all possible details like links, buttons, animations, and forms to ensure that everything is working perfectly.
3 of the best web development tools can streamline your coding process:
If these tools are not helpful, you can try 12 best web development software.
Once a website is developed successfully, you and your team should move to the next step: testing. Two questions should be considered before testing:
Does your website follow the design that you've made?
Are there any potential problems while the website is running?
You and your testing team should test it thoroughly and find all possible issues in advance. Any tiny detail or problem should not be ignored.
3 of the best website testing tools can help you save time:
Finally, it's time to launch the website. To avoid missing any point or step, it is best for you to use a checklist. A successful or perfect website cannot be developed in one go. You and your team should test the launched website, collect feedback from real users, fix all possible issues, and maintain the website regularly.
In actual design cases, the web design process can be more complicated, and more minor steps can be involved. To avoid skipping or missing any step, it is a good idea to document your web design process outline in advance. Making a website design process checklist will help you quicken the web design process a lot. Write down all the necessary steps and check them one by one while working on a website design project.
If you don't know how to create one, you can check 45 web design checklists and questionnaires to get some inspiration.
Wrap up
Even though different website projects have different features, you and your team may follow similar web design processes to build them.
We hope that this comprehensive 10 step website design process can help you quicken your design process effectively.
 Mockplus RP
A free prototyping tool to create wireframes or interactive prototypes in minutes.
 Mockplus DT
A free UI design tool to design, animate, collaborate and handoff right in the browser.


 Sign up with Google